
Most people, whether they know it or not, have seen the end result of panelized construction: the unique homes and churches that spring up in their area.
What most people never see, however, is what goes into engineering, manufacturing, and building the final home. That’s why we put together this step-by-step guide of what goes into manufacturing the panels that comprise a Barden home.
Before Panel Built Home Manufacturing Comes Engineering
 Engineering is one of the phases that is sometimes forgotten about when people picture panel built home construction. Sandwiched between the design phase and the manufacturing phase, engineering is an important step for aligning all teams’ efforts.
After the drafting and design process is completed on the home, the team of designers at North American Truss (our manufacturing division) use MiTek E-frame engineering software to break down the plan into individual components for manufacturing.
They design each part individually, keeping in mind factors such as:
-
Snow load capabilities
-
Local building codes
-
Customization requests
Making sure that all of these factors, and more, are considered helps to ensure that there are no issues during the building phase of the project and, more importantly, ensures the new homeowners do not encounter issues after moving in.
11 Steps For Panel Built Home Manufacturing
After the plans are finalized, they're turned over to the team to North American Truss and work begins on producing the components for the home.
Most panel builds go through the same steps as on-site construction, with some variation depending on customization and size requirements for the build.
Step 1: Lumber
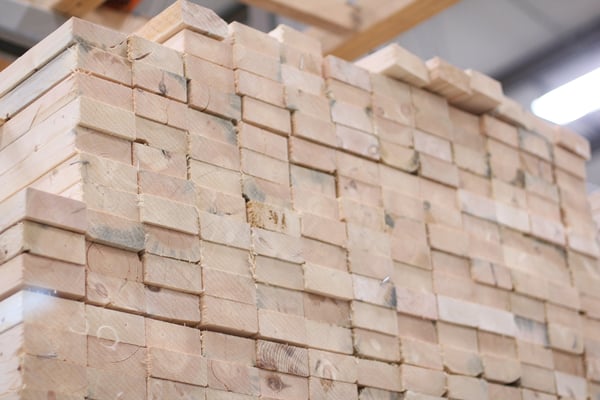
Before work can truly commence in the shop, lumber and materials must first be brought in. Lumber is brought in from Canada due to proximity to where it is sourced. With the colder temperatures up North, the lumber grows more dense.
Barden home panels are built mainly with Spruce Pine Fir lumber. Other species may be used depending on design requirements.
Step 2: The Lumber is Measured & Cut
Not long after delivery, the lumber is put into a 20” up cut saw with a Tiger Stop computerized measuring that cuts it to the exact length that is needed for the wall panels. This digital equipment makes it easy to measure and cut to exact dimensions, ensuring that there are no gaps and that all of the panels fit together.
Rather than traditional building methods where lumber is dumped on site and sits in the elements awaiting use, the lumber used for your home's panels is protected indoors and sized per project -- eliminating waste and protecting material quality.
If there is any excess lumber left, it is used for other areas of the project or another project. If it cannot be used in-house by our team, it is donated to the local community.
Step 3: Components Are Layed Out & Built
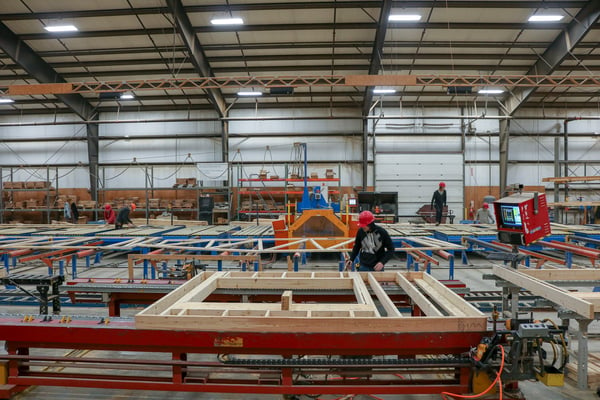 Once the lumber is cut for the window and door openings, it is transferred to an IBS (Intelligent Building Systems) table equipped with a light bar driven by the MiTek E-frame program for layout. This is a computer-driven way of laying out the components, which ensures precision.
The IBS table travels in and out of a track system, and can adjust to accommodate building panels as small as 2 feet or as large as 12 feet.
After the window or door opening is placed in the panel as computer specified, the panel is secured squarely and clamped into the IBS layout table. Then it is precision nailed together with the attached nailing dollies on each side of the layout table.
IBS tables are reset and calibrated weekly to ensure that precision is maintained. This guarantees every component is perfectly square -- within 1/16th of an inch of the specified measurement.
Step 4: Sheathing Table
.jpg?width=600&name=Barden-wall-frame-2%20(1).jpg)
This step is where the sheathing (skin) is applied to exterior panels. Depending on the customer’s specification for their build, this material can be:
-
OSB board
-
Plywood
-
Insulation board
The sheathing is applied to the exterior panels with a staple gun and a router mounted on an IBS bridge extends over the panel and the router drops down into the window or door opening and travels around the edge of the opening to complete the window or door cut out.
Compared to a chainsaw or other tool that is used during a traditional build, the drop router creates a much more precise opening that the window or door can fit flawless into, leaving no gaps. This leads to a final panel built home that is more efficient than when built with traditional methods on the job site where builders are relying on a tape measure and saw.
Step 5: Stapling Bridge
.jpg?width=600&name=Barden-Worker-3%20(1).jpg)
In this step, the sheathing is attached in its entirety.
Depending on the project, this is accomplished by:
-
Use of the IBS pneumatic stapling bridge
-
Nailing with pneumatic nail guns
-
Application of screws
During machine stapling each stud is secured to the sheathing. Panels up to 12 feet in height can be stapled all at once with the bridge with the staples being evenly placed.
We often recommend machine stapling when the project can accommodate it due to the materials that are used. Barden home panels have galvanized steel staples that do not rust, and can bear more weight than a standard nail or screw. The staple is coated with a unique glue that seals into the lumber due to the friction created during application.
Additionally, due to the capabilities of machine stapling, this a more refined process through exact even lengths and even spacing versus traditional nail gun methods.
Step 6: Prepare for Shipping
It is at this stage that the wall panel is now complete. The panel number that corresponds with the engineering plans is marked on the wood, and it is added to each panel. They are then stacked together for shipment.
Once completed, the panels are secured and ready for shipment. Each truck driver is equipped with a set of building plans that has all of the panel numbers on it, allowing the building process to be as seamless as a 3D puzzle.
Step 7: Truss Manufacturing Begins
Before beginning, the truss designer has examined the building plans utilizing the Mitek E-frame engineering program to determine load bearing points and lumber and truss plate requirements. They then create all of the shop cutting and manufacturing paperwork.
The lumber for the trusses is pulled based on the nearest dimensional length and other building specifications. North American Truss predominantly works with (SPF) lumber but many times other species are required for strength values. This often includes Southern Yellow Pine (SYP). Both of theses species are available in several grades of Machine Stress Ratings (MSR).
By hand selecting what lumber is ideal for each facet of the truss, heavier lumber is replaced with lighter lumber without compromising the strength of the final build.
Trusses are usually made with multiple types of wood. This is important because:
-
It allows for customization
-
The ideal final product is optimized
-
Overall cost is reduced
-
Installation in the field is much easier
Step 8: The Truss Lumber is Cut
.jpg?width=600&name=Barden-machine-3%20(1).jpg)
After being selected, the lumber is put on the conveyor for the saw. North American Truss' saw is capable of performing 5 cuts at the same time on a board as the lumber passes through the saw, and can achieve angles that are otherwise difficult.
This allows for a uniform final cut, and eliminates gaps or imperfections.
Step 9: Component Pieces (Webs and Cords) Are Layed Out
.jpg?width=600&name=Barden-workers-7%20(1).jpg)
The truss number is written on the webs and cords to correspond with each truss to ensure clarity when assembly commences.
The components are then transferred to a Mitek Truss table for set up and assembly. The table is 120-feet-long and 13-feet-wide to accommodate projects of all sizes. Projects with truss dimension requirements exceeding the table size are accomplished in smaller pieces, and assembled in the field.
Similar to the wall process, the layout is computerized. It works with a MiTek E-frame engineering program and laser projection system. This laser system is the pinnacle of precision, and is what’s used to locate, drill holes, and place rivets for Boeing’s 747 aircraft.
For our purposes, the ViRTEK lasers map out the placement of all truss lumber components (cords and webs) and the sizes and locations of all truss plates for assembly of each truss. The table has metal jigs set up to secure the truss components in place for assembly.
Step 10: Truss Plate Installation
The truss plate size and style are determined in the design and engineering phases. Plates come in different gauges, sizes, and strengths based on the lumber type and load-bearing requirements.
A Mitek truss plate is applied to the top and underside of each connection point of the truss and lightly secured into place.
Then a Mitek Roof Tracker gantry press travels over the table top to secure the truss plates partially into the wood. The truss then is transferred from the table to a roller system that takes the truss to the Mitek final roller press where the truss goes through the press completing the final plate application.
Step 11: Ready for Shipping
The final manufactured trusses are then marked with the truss number on each of them to indicate their location in the building.
Once loaded on the trailer, they are ready for on-site installation.
Are You Ready to Get the Ball Rolling on Your Panel Built Home?
Of course, before manufacturing -- and even engineering and design -- comes contacting.
If you’re ready to make your dream home a reality, contact our team of building professionals. We’re committed to bringing the same level of precision and quality outlined above to your future home.